Create an Azure Storage Account for securely sharing files with clients
Create an Azure Storage Account
- In Azure Portal create a new Storage Account in a new or existing resource group. The tenant and subscription will depend on the client for which the file sharing is needed.
- During setup ensure that "Enable storage account key access" is enabled.

- If huge need to be shared (1TB +), ensure that "Enable large file shares" is enabled.

Create a blob container
- In Azure Portal browse to the Azure Storage Account that was created and go to the "Containers" blade.
- Add a new Container and give it a name.

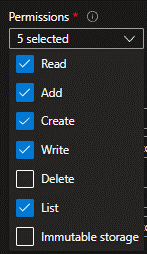
- Set the appropriate permission for the Shared access token.

- If the client has a known IP address configure "Allowed IP addresses" (Optional).

- Set an appropriate date and time for "Start" and "Expiry" of the shared access token.

- Click "Generate SAS token and URL"
- Copy the Blob SAS URL from the resulting text box and send to the client

Share files using Azure Storage Explorer
https://docs.nml.co.za/docs/user-azure-storage-explorer-to-share-files-with-clients